https://qiita.com/y-tsutsu/items/54c10e0b2c6b565c887a


Pipenvを使ったPython開発まとめ

はじめに

今年は複数人でいっしょにPythonを使って開発を行う機会があったのですが,そのときに導入したPipenvがいい感じでしたので一通りの基本操作についてまとめてみようと思います.個人での開発でも有効だと思いますが,複数人で開発するときに便利かなと感じたところも多かったので,そういう視点も入れながらまとめてみました.
※個人的にチームでの開発でよかった内容に:christmas_tree:をつけています.

Pipenvとは

Pythonで開発するときに,プロジェクト毎のパッケージ管理や仮想環境の構築を簡単に自動で行ってくれるツールです.Node.jsのnpmなんかを使ったことがあればイメージがわきやすいと思います.
パッケージのインストールならpip,仮想環境の構築ならvirtualenv(venv)を使えば対応できますが,pipenvはそれらをまとめてより簡単に扱えるようにサポートしてくれます.またnpm-scriptsのようにコマンドに名前をつけて登録することもできます.

Pipenvのインストール

Pipenv自体のインストールはpipから行えます.簡単ですね.

$ pip install pipenv

Pipenvの使い方

Pipenvの基本的な使い方を順にまとめていきます.この記事を書いたときの手元の環境は次の通りです.

  • Windows 10 Pro,Debian 9
  • Python 3.7.1
  • pipenv 2018.11.14

初期化

まずは新規のプロジェクトの初期化方法です.
プロジェクトのディレクトリに移動して次のコマンドを実行すると,自動で仮想環境が作成されてPipfileというファイルが生成されます.Pythonのバージョンの指定は3.7など,より詳細に指定もできます.

$ pipenv --python 3    # Python3系で初期化する例です

またpyenvを使用している場合は,環境に入っていないバージョンを指定したときにはpyenvと連動してPythonのインストールが自動的に行われます.

$ pipenv --python 3.6
Warning: Python 3.6 was not found on your system…
Would you like us to install CPython 3.6.7 with pyenv? [Y/n]: y
Installing CPython 3.6.7 with pyenv (this may take a few minutes)…
⠦ Installing python...

パッケージのインストール

パッケージのインストールは次のように行います.このときも(まだ作っていなければ)仮想環境が自動的に作られて,そこにパッケージがインストールされます.またpipenvからパッケージをインストールするとPipfileにパッケージが追加されます.

$ pipenv install numpy    # numpyをインストールする例です
Pipfile
[packages]
numpy = "*"

またこのときにPipfile.lockが自動で生成され,実際にインストールされたパッケージの詳細なバージョンや依存パッケージの情報などが記録されます.これをもとに他PCで環境を再現することが簡単にできます.

:christmas_tree:pipenvを使うと,このようにパッケージの管理や仮想環境の生成が自動的に行われて便利です.チームにPythonに不慣れなメンバーがいても,pipを直接使ってrequirements.txtを更新し忘れてしまったり,仮想環境を作らずに関係のないパッケージまで管理されてしまったりを防ぐことができます.

開発用パッケージのインストール

通常のパッケージのインストールの他に--devオプションを使うことで,開発環境のみで使うパッケージを別枠(dev-packages)で管理しながらインストールすることができます.これを利用して開発プロジェクト内でコードの整形や静的開発の利用を促すこともできます.

$ pipenv install --dev autopep8 flake8
Pipfile
[dev-packages]
autopep8 = "*"
flake8 = "*"

:christmas_tree:このように開発用のパッケージを切り分けて管理できると,コードの品質向上につなげることができるパッケージをチームに布教しやすいです.(後述するScriptsも活用するとより良いです.)

requirements.txtからのインストール

Pipenvの導入前にrequirements.txtでパッケージが管理されていた場合に,その内容からPipenvでインストールすることもできます.

$ pipenv install -r ./requirements.txt

Pipfile,Pipfile.lockから環境の再現

すでに誰かが環境を作成してPipfileがgitなどで管理されていると,他のメンバーも簡単に環境を作成することができます.
次の方法だと,Pipfileの中で管理されているパッケージがインストールされます.このときにインストールされた内容でPipfile.lockが更新されます.

$ pipenv install
$ pipenv install --dev    # --devオプションで通常のパッケージの他に開発用パッケージもインストールされます

同様にPipfile.lockが手元にあり,PipfileでなくPipfile.lockから詳細なバージョンなども合わせて環境を作成したい場合は次のようにします.
この場合は,PipfileでなくPipfile.lockを使ってインストールされ,環境を再現することができます.

$ pipenv sync
$ pipenv sync --dev    # 開発用パッケージもインストールしたい場合はinstallと同様に--devオプションを

:christmas_tree:上記のように既に開発中のプロジェクトに新しいメンバーが追加になっても,開発環境をコマンド一つで準備することができます.

:christmas_tree:スクリプトの登録

独自のスクリプトを名前を付けて登録することができます.npmなんかでもよく使われていると思いますが,これが個人的にはチーム開発するときにとても便利だと思います.
プロダクトのmainスクリプトのキックやUnitテストの実行,コードの整形やLintツールの実行などを登録しておけば,詳しいドキュメントをチームで共有する手間も省けますし,実際にメンバーに使ってもらいやすいという印象です.

使い方は,Pipfileに[scripts]を用意して登録します.例えば次のような感じです.

Pipfile
[scripts]
start = "python main.py runserver"
test = "python -m unittest discover -v"
format = "autopep8 -ivr ."
lint = "flake8 --show-source ."

スクリプトの実行は次のように行います.

$ pipenv run start    # [scripts]のstartを実行する例です

また,scriptsに登録するほどでもないPythonのコードを個別に実行するときは,次のように呼び出すことができます.

$ pipenv run python spam.py    # spam.pyを仮想環境に入らずに実行する例です

仮想環境関連の操作

pipenvで作られた仮想環境へ入るには次のように行います.よく使う操作はscriptsに登録しておきたいですが,ちょっとした操作を行うときには知っておくと便利です.

$ pipenv shell
Launching subshell in virtual environment…
(mypipenv-XXXXXXXX) $ exit    # 抜けるときはexit

また仮想環境のパスが知りたい場合は次のように行います.

$ pipenv --venv
C:\Users\username\.virtualenvs\mypipenv-XXXXXXXX

デフォルトではWindowsは%userprofile%\.virtualenvs,Linuxは$HOME/.local/share/virtualenvs以下に仮想環境が生成されます.仮想環境を生成する場所を指定したい場合には,以下のように環境変数を設定します.

$ export WORKON_HOME=~/venvs    # Windowsは`set WORKON_HOME=~/venvs`
$ pipenv --python 3             # ~/venvsディレクトリに仮想環境が生成される

またプロジェクトのディレクトリに仮想環境を作成したい場合は以下のように環境変数を設定します.

$ export PIPENV_VENV_IN_PROJECT=true    # Windowsは`set PIPENV_VENV_IN_PROJECT=true`
$ pipenv --python 3                     # ./.venvディレクトリに仮想環境が生成される

仮想環境を削除するには以下のように行います.

$ pipenv --rm

ちょっと高度なパッケージの管理関連

バージョンを指定してパッケージをインストールする場合は次のように行います.

$ pipenv install numpy==1.14

GitHubのリポジトリを指定してインストールする場合は次のように行います.

$ pipenv install git+https://github.com/<ユーザ>/<リポジトリ>.git@<リビジョン>#egg=<パッケージ名>

インストールされているパッケージのバージョンアップをするには次のように行います.

$ pipenv update

インストールされているパッケージの一覧を確認するには次のように行います.依存関連が分かるように出力されて便利です.

$ pipenv graph
autopep8==1.4.3
  - pycodestyle [required: >=2.4.0, installed: 2.4.0]
flake8==3.6.0
  - mccabe [required: >=0.6.0,<0.7.0, installed: 0.6.1]
  - pycodestyle [required: >=2.4.0,<2.5.0, installed: 2.4.0]
  - pyflakes [required: >=2.0.0,<2.1.0, installed: 2.0.0]
  - setuptools [required: >=30, installed: 40.6.2]
numpy==1.15.4

.envの自動読み込み

プロジェクトに.envファイルを用意しておくと,pipenv runpipenv shellを実行するときに自動で読み込んでくれます.ハードコーディングするにはまずい内容やローカルのテスト環境ならではの設定を登録しておくと便利です.

.env
DEBUG=1
$ pipenv run python
>>> import os
>>> os.environ['DEBUG']
'1'

:christmas_tree:おまけ

pipenvでinstallすると次のように蛇の絵文字が表示されます.(絵文字が表示できる環境で見ましょう.)
image.png

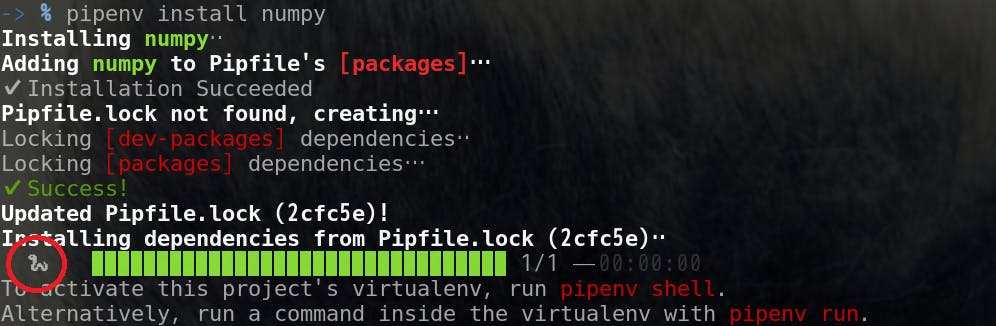
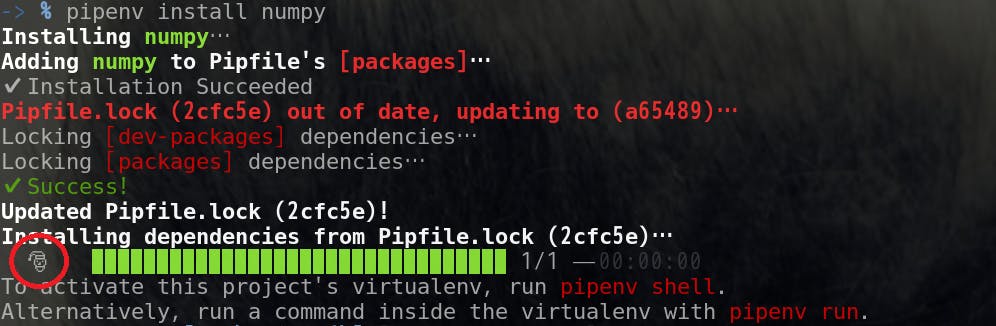
ハロウィンの日にはなんとパンプキンの絵文字が表示されていました!チームで開発しているとより一層もりあがりますね:jack_o_lantern:
image.png

少しフライングですがクリスマスにはサンタさんが...ぜひクリスマスにPipenvを使ってコードを書きましょう:santa:
image.png


概要

説明

Promise.all ( iterable )

引数(iterable)には、実行したいPrimiseのインスタンスを任意の数だけ配列で指定する。この引数の配列に例えば文字列や数値など、インスタンス以外の値が含まれる場合、その値は、その値をfulfilledの結果として返すインスタンスに変換されます。

全ての結果が履行(fulfilled)だった場合は、fulfilledの値を集めた配列を返す。1つでも拒否(rejected)があった場合は、最初に発生したrejectedの値を返す。

チュートリアル

  • Promiseのインスタンスを3つ用意します。
// Promise関数 (1)
var promise1 = new Promise( function( resolve, reject ) {
  setTimeout( function () {
      resolve( "3秒経過" ) ;
  }, 3000 ) ;
} ) ;
// Promise関数 (2)  
var promise2 = new Promise( function( resolve, reject ) {  
    setTimeout( function () {  
      resolve( "1秒経過" ) ;  
    }, 1000 ) ;  
} ) ;

// Promise関数 (3)  
var promise3 = new Promise( function( resolve, reject ) {  
    setTimeout( function () {  
        resolve( "2秒経過" ) ;  
    }, 2000 ) ;  
} ) ;
  • 用意した3つのインスタンスをall()で実行します。全てのインスタンスの状態が履行(fulfilled)になった時点で処理が完了し、then()の第1引数が実行されます。
Promise.all( [ promise1, promise2, promise3 ] ).then( function ( message ) {
    console.log( message ) ;    // [ "3秒経過", "1秒経過", "2秒経過", ]
} ) ;
  • または、いずれかのインスタンスの状態が拒否(rejected)になった場合は、そこで処理が完了し、その値が返ります。
// Promise関数 (3)
var promise3 = new Promise( function( resolve, reject ) {
    setTimeout( function () {
        reject( "失敗!!" ) ;
    }, 2000 ) ;
} ) ;

Promise.all( [ promise1, promise2, promise3 ] )
.then( function ( message ) {
    console.log( message ) ;    // rejectedがある場合は実行されない
} )
.catch( function ( reason ) {
    console.log( reason ) ;    // "失敗!!"
} ) ;

デモ

<!-- このコードは編集できます。 -->
​
<!DOCTYPE html>
<html>
<head>
    <style>
pre {
    white-space: pre-wrap ;
}
    </style>
</head>
<button id="run">実行</button>
<hr>
<pre id="result"></pre>
<body>
<script>
document.getElementById( "run" ).onclick = function () {
document.getElementById( "result" ).textContent = "" ;
​
/** try it! **/
var promise1 = new Promise( function( resolve, reject ) {
    setTimeout( function () {
        resolve( "3秒経過" ) ;
//  reject( "promise1で失敗!!" ) ;
    }, 3000 ) ;
} ) ;
​
var promise2 = new Promise( function( resolve, reject ) {
    setTimeout( function () {
        resolve( "1秒経過" ) ;
//  reject( "promise2で失敗!!" ) ;
    }, 1000 ) ;
} ) ;
​
var promise3 = new Promise( function( resolve, reject ) {
    setTimeout( function () {
        resolve( "2秒経過" ) ;
//  reject( "promise3で失敗!!" ) ;
    }, 2000 ) ;
} ) ;
​
Promise.all( [ promise1, promise2, promise3 ] )
.then( function ( message ) {
    console.log( message ) ;
    document.getElementById( "result" ).appendChild( new Text( JSON.stringify( message ) + "\n" ) ) ;
} )
.catch( function ( reason ) {
    console.log( reason ) ;
    document.getElementById( "result" ).appendChild( new Text( JSON.stringify( reason ) + "\n" ) ) ;
} ) ;
/** try it! **/
​
}
</script>
</body>
</html>

https://docs.python.org/2/library/traceback.html


traceback — Print or retrieve a stack traceback


This module provides a standard interface to extract, format and print stack traces of Python programs. It exactly mimics the behavior of the Python interpreter when it prints a stack trace. This is useful when you want to print stack traces under program control, such as in a “wrapper” around the interpreter.

The module uses traceback objects — this is the object type that is stored in the variables sys.exc_traceback (deprecated) and sys.last_traceback and returned as the third item from sys.exc_info().

The module defines the following functions:

traceback.print_tb(tb[limit[file]])

Print up to limit stack trace entries from the traceback object tb. If limit is omitted or None, all entries are printed. If file is omitted or None, the output goes to sys.stderr; otherwise it should be an open file or file-like object to receive the output.

traceback.print_exception(etypevaluetb[limit[file]])

Print exception information and up to limit stack trace entries from the traceback tb to file. This differs from print_tb() in the following ways: (1) if tb is not None, it prints a header Traceback (most recent call last):; (2) it prints the exception etype and value after the stack trace; (3) if etype is SyntaxError and value has the appropriate format, it prints the line where the syntax error occurred with a caret indicating the approximate position of the error.

traceback.print_exc([limit[file]])

This is a shorthand for print_exception(sys.exc_type, sys.exc_value, sys.exc_traceback, limit, file). (In fact, it uses sys.exc_info() to retrieve the same information in a thread-safe way instead of using the deprecated variables.)

traceback.format_exc([limit])

This is like print_exc(limit) but returns a string instead of printing to a file.

New in version 2.4.

traceback.print_last([limit[file]])

This is a shorthand for print_exception(sys.last_type, sys.last_value, sys.last_traceback, limit, file). In general it will work only after an exception has reached an interactive prompt (see sys.last_type).

traceback.print_stack([f[limit[file]]])

This function prints a stack trace from its invocation point. The optional f argument can be used to specify an alternate stack frame to start. The optional limit and file arguments have the same meaning as for print_exception().

traceback.extract_tb(tb[limit])

Return a list of up to limit “pre-processed” stack trace entries extracted from the traceback object tb. It is useful for alternate formatting of stack traces. If limit is omitted or None, all entries are extracted. A “pre-processed” stack trace entry is a 4-tuple (filenameline number, function name*, text) representing the information that is usually printed for a stack trace. The text is a string with leading and trailing whitespace stripped; if the source is not available it is None.

traceback.extract_stack([f[limit]])

Extract the raw traceback from the current stack frame. The return value has the same format as for extract_tb(). The optional f and limit arguments have the same meaning as for print_stack().

traceback.format_list(extracted_list)

Given a list of tuples as returned by extract_tb() or extract_stack(), return a list of strings ready for printing. Each string in the resulting list corresponds to the item with the same index in the argument list. Each string ends in a newline; the strings may contain internal newlines as well, for those items whose source text line is not None.

traceback.format_exception_only(etypevalue)

Format the exception part of a traceback. The arguments are the exception type, etype and value such as given by sys.last_type and sys.last_value. The return value is a list of strings, each ending in a newline. Normally, the list contains a single string; however, for SyntaxError exceptions, it contains several lines that (when printed) display detailed information about where the syntax error occurred. The message indicating which exception occurred is the always last string in the list.

traceback.format_exception(etypevaluetb[limit])

Format a stack trace and the exception information. The arguments have the same meaning as the corresponding arguments to print_exception(). The return value is a list of strings, each ending in a newline and some containing internal newlines. When these lines are concatenated and printed, exactly the same text is printed as does print_exception().

traceback.format_tb(tb[limit])

A shorthand for format_list(extract_tb(tb, limit)).

traceback.format_stack([f[limit]])

A shorthand for format_list(extract_stack(f, limit)).

traceback.tb_lineno(tb)

This function returns the current line number set in the traceback object. This function was necessary because in versions of Python prior to 2.3 when the -O flag was passed to Python the tb.tb_lineno was not updated correctly. This function has no use in versions past 2.3.

28.10.1. Traceback Examples

This simple example implements a basic read-eval-print loop, similar to (but less useful than) the standard Python interactive interpreter loop. For a more complete implementation of the interpreter loop, refer to the code module.

import sys, traceback

def run_user_code(envdir):
    source = raw_input(">>> ")
    try:
        exec source in envdir
    except:
        print "Exception in user code:"
        print '-'*60
        traceback.print_exc(file=sys.stdout)
        print '-'*60

envdir = {}
while 1:
    run_user_code(envdir)

The following example demonstrates the different ways to print and format the exception and traceback:

import sys, traceback

def lumberjack():
    bright_side_of_death()

def bright_side_of_death():
    return tuple()[0]

try:
    lumberjack()
except IndexError:
    exc_type, exc_value, exc_traceback = sys.exc_info()
    print "*** print_tb:"
    traceback.print_tb(exc_traceback, limit=1, file=sys.stdout)
    print "*** print_exception:"
    traceback.print_exception(exc_type, exc_value, exc_traceback,
                              limit=2, file=sys.stdout)
    print "*** print_exc:"
    traceback.print_exc()
    print "*** format_exc, first and last line:"
    formatted_lines = traceback.format_exc().splitlines()
    print formatted_lines[0]
    print formatted_lines[-1]
    print "*** format_exception:"
    print repr(traceback.format_exception(exc_type, exc_value,
                                          exc_traceback))
    print "*** extract_tb:"
    print repr(traceback.extract_tb(exc_traceback))
    print "*** format_tb:"
    print repr(traceback.format_tb(exc_traceback))
    print "*** tb_lineno:", exc_traceback.tb_lineno

The output for the example would look similar to this:

*** print_tb:
  File "<doctest...>", line 10, in <module>
    lumberjack()
*** print_exception:
Traceback (most recent call last):
  File "<doctest...>", line 10, in <module>
    lumberjack()
  File "<doctest...>", line 4, in lumberjack
    bright_side_of_death()
IndexError: tuple index out of range
*** print_exc:
Traceback (most recent call last):
  File "<doctest...>", line 10, in <module>
    lumberjack()
  File "<doctest...>", line 4, in lumberjack
    bright_side_of_death()
IndexError: tuple index out of range
*** format_exc, first and last line:
Traceback (most recent call last):
IndexError: tuple index out of range
*** format_exception:
['Traceback (most recent call last):\n',
 '  File "<doctest...>", line 10, in <module>\n    lumberjack()\n',
 '  File "<doctest...>", line 4, in lumberjack\n    bright_side_of_death()\n',
 '  File "<doctest...>", line 7, in bright_side_of_death\n    return tuple()[0]\n',
 'IndexError: tuple index out of range\n']
*** extract_tb:
[('<doctest...>', 10, '<module>', 'lumberjack()'),
 ('<doctest...>', 4, 'lumberjack', 'bright_side_of_death()'),
 ('<doctest...>', 7, 'bright_side_of_death', 'return tuple()[0]')]
*** format_tb:
['  File "<doctest...>", line 10, in <module>\n    lumberjack()\n',
 '  File "<doctest...>", line 4, in lumberjack\n    bright_side_of_death()\n',
 '  File "<doctest...>", line 7, in bright_side_of_death\n    return tuple()[0]\n']
*** tb_lineno: 10

The following example shows the different ways to print and format the stack:

>>> import traceback
>>> def another_function():
...     lumberstack()
...
>>> def lumberstack():
...     traceback.print_stack()
...     print repr(traceback.extract_stack())
...     print repr(traceback.format_stack())
...
>>> another_function()
  File "<doctest>", line 10, in <module>
    another_function()
  File "<doctest>", line 3, in another_function
    lumberstack()
  File "<doctest>", line 6, in lumberstack
    traceback.print_stack()
[('<doctest>', 10, '<module>', 'another_function()'),
 ('<doctest>', 3, 'another_function', 'lumberstack()'),
 ('<doctest>', 7, 'lumberstack', 'print repr(traceback.extract_stack())')]
['  File "<doctest>", line 10, in <module>\n    another_function()\n',
 '  File "<doctest>", line 3, in another_function\n    lumberstack()\n',
 '  File "<doctest>", line 8, in lumberstack\n    print repr(traceback.format_stack())\n']

This last example demonstrates the final few formatting functions:

>>> import traceback
>>> traceback.format_list([('spam.py', 3, '<module>', 'spam.eggs()'),
...                        ('eggs.py', 42, 'eggs', 'return "bacon"')])
['  File "spam.py", line 3, in <module>\n    spam.eggs()\n',
 '  File "eggs.py", line 42, in eggs\n    return "bacon"\n']
>>> an_error = IndexError('tuple index out of range')
>>> traceback.format_exception_only(type(an_error), an_error)
['IndexError: tuple index out of range\n']


javascript : call, apply, bind 차이 - this의 사용

자바스크립트에서는 일반적인 방법 외에도, 함수를 어디서 어떻게 호출했느냐와 관계없이 this가 무엇인지 지정할 수 있다.

call

call 메서드는 모든 함수에서 사용할 수 있으며, this를 특정 값으로 지정할 수 있다.

<script type="text/javascript">  
const bruce = {  
     name : 'Bruce'  
};  

const madeline = {  
    name : 'Madeline'  
};  

//이 함수는 어떤 객체에도 연결되지 않았지만 this를 사용함.  
function greet(){  
    return `Hello, I'm ${this.name}`;  
};  

greet(); // 'Hello, I'm undefined' - this는 어디에도 묶이지 않음  
greet.call(bruce) // 'Hello, I'm Bruce' - this는 bruce  
greet.call(madeline) // 'Hello, I'm Madeline' - this는 madeline  
</script>

함수를 호출하면서 call을 사용하고 this로 사용할 객체를 넘기면 해당 함수가 주어진 객체의 메서드인 것처럼 사용할 수 있다. call의 첫 번째 매개변수는 this로 사용할 값이고, 매개변수가 더 있으면 그 매개변수는 호출하는 함수로 전달된다.

<script type="text/javascript"\>  
function update(birthYear, occupation){  
    this.birthYear = birthYear;  
    this.occupation = occupation;  
};  

update.call(bruce, 1949, 'singer'); // bruce 변경  
/*  
bruce는 이제  
{  
name : 'Bruce',  
birthYear : 1949,  
occupation : 'singer'  
}  
로 변경됨  
*/  

update.call(madeline, 1942, 'actress'); // madeline 변경  
/*  
madeline은 이제  
{  
name : 'Madeline',  
birthYear : 1942,  
occupation : 'actress'  
}  
로 변경됨  
*/  
</script>

apply

apply는 함수 매개변수를 처리하는 방법을 제외하면 call과 완전히 같다. call은 일반적인 함수와 마찬가지로 매개변수를 직접 받지만, apply는 매개변수를 배열로 받는다.

<script type="text/javascript">  
update.apply(bruce, [1955, 'actor']);  
/*  
bruce는 이제  
{  
name : 'Bruce',  
birthYear : 1955,  
occupation : 'actor'  
}  
로 변경됨  
*/

update.apply(madeline, [1918, 'writer']);  
/*
madeline은 이제  
{  
name : 'Madeline',  
birthYear : 1918,  
occupation : 'writer'  
}  
로 변경됨  
*/  
</script>

apply는 배열 요소를 함수 매개변수로 사용해야 할 때 유용하다. apply를 설명할 때 흔히 사용하는 예제는 배열의 최소값과 최대값을 구하는 것이다. 자바스크립트의 내장 함수인 Math.min 과 Math.max 는 매개변수를 받아 그중 최소값과 최대값을 각각 반환한다. apply를 사용하면 기존 배열을 이들 함수에 바로 넘길 수 있다.

<script type="text/javascript">  
const arr = [2,3,-5,15,7];  

Math.min.apply(null, arr); // -5  
Math.max.apply(null, arr); // 15  
</script>

this의 값에 null을 쓴 이유는 Math.min과 Math.max가 this와 관계 없이 동작하기 때문이다. 즉, 무엇을 넘기든 관계없다.

ES6의 확산 연산자(...)를 사용해도 apply와 같은 결과를 얻을 수 있다. update 메서드는 this 값이 중요하므로 call을 사용해야 하지만, Math.min과 Math.max는 this 값이 무엇이든 관계없으므로 확산 연산자를 그대로 사용할 수 있다.

<script type="text/javascript">  
const newBruce = [1940, "martial artist"];  

update.call(bruce, ...newBruce); // apply(bruce, newBruce)와 같음  
Math.min(...arr); // -5  
Math.max(...arr); // 15  
</script>

bind

this의 값을 바꿀 수 있는 마지막 함수는 bind이다. bind를 사용하면 함수의 this 값을 영구히 바꿀 수 있다. update 메서드를 이리저리 옮기면서 호출할 때 this 값은 항상 bruce가 되게끔, call이나 apply, 다른 bind와 함께 호출하더라도 this 값이 bruce가 되도록 하려면 bind를 사용한다.

<script type="text/javascript">  
const updateBruce = update.bind(bruce);  

updateBruce(1904, "actor");  
// bruce 는 이제 { name: "Bruce", birthYear: 1904, occupation: "actor" }  

updateBruce.call(madeline, 1274, "king");  
// bruce 는 이제 { name: "Bruce", birthYear: 1274, occupation: "king" };  
// madeline은 변하지 않음  
</script>

bind는 함수의 동작을 영구적으로 바꾸므로 찾기 어려운 버그의 원인이 될 수 있다. bind를 사용한 함수는 call이나 apply, 다른 bind와 함께 사용할 수 없는 거나 마찬가지다. 함수를 여기저기서 call이나 apply로 호출해야 하는데, this 값이 그에 맞춰 바뀌어야 하는 경우를 상상해보라. 이럴 때 bind를 사용하면 문제가 생긴다. bind를 쓰지 말라고 권하는 것은 아니다. bind는 매우 유용하지만, 함수의 this가 어디에 묶이는지 정확히 파악하고 사용해야 한다.

bind에 매개변수를 넘기면 항상 그 매개변수를 받으면서 호출되는 새 함수를 만드는 효과가 있다. 예를 들어 bruce가 태어난 해를 항상 1949로 고정하지만, 직업은 자유롭게 바꿀 수 있는 업데이트 함수를 만들고 싶다면 다음과 같이 하면 된다.

<script type="text/javascript"\>  
const updateBruce1949 = update.bind(bruce, 1949); updateBruce1949("singer, songwriter");  
/*  
bruce 는 이제 {  
name: "Bruce",  
birthYear: 1949,  
occupation: "singer, songwriter"  
}  
*/  
</script>

출처:https://ibrahimovic.tistory.com/29[Web Standard]

함수 호출과 this

JAVA같은 언어에서 this는 클래스로부터 생성되는 인스턴스 객체를 의미한다.다른 의미를 가질 염려가 없어서 혼란이 생기지 않는다.

자바스크립트에서는 this는 함수의 현재 실행 문맥(context)이다.

arguments 객체

C와 같은 엄격한 언어와 달리, 자바스크립트에서는 함수를 호출할 때 함수 형식에 맞춰 인자를 넘기지 않더라도 에러가 발생하지 않는다. 정의된 함수의 인자보다 적게 함수를 호출했을 경우, 넘겨지지 않은 인자에는undefined값이 할당된다. 이와 반대로 정의된 인자 개수보다 많게 호출했을 경우 초과된 인수는 무시된다.

이러한 특성 때문에, 런타임 시에 호출된 인자의 개수를 확인하고 이에 따라 동작을 다르게 해줘야 할 경우가 있다. 이를 가능케 하는게 함수를 호출할 때 암묵적으로 전달되는 arguments 객체다. 이 객체는 실제 배열이 아닌 유사 배열 객체이다.

function add(a, b) { 
  console.dir(arguments); 
  return a + b; 
} 

console.log(add(1)); // NaN 
console.log(add(1, 2)); // 3 
console.log(add(1, 2, 3)); // 3

호출 패턴과 this 바인딩

자바스크립트에서 함수를 호출할 때 기존 매개변수로 전달되는 인자값에 더해, 앞서 설명한 arguments 객체 및this 인자가 함수 내부로 암묵적으로 전달된다.this가 이해하기가 어려운 이유는 자바스크립트의 여러 가지 함수가 호출되는 방식(호출 패턴)에 따라 this가 다른 객체를 참조하기(this 바인딩) 때문이다.

1. 객체의 메서드 호출할 때 this 바인딩

객체의 프로퍼티가 함수일 경우, 이 함수를 메서드라고 부른다. 메서드 내부 코드에서 사용된 this는해당 메서드를 호출한 객체로 바인딩 된다.

var myObject = { 
  name: 'foo', 
  sayName: function () {
    console.log(this == myObject) // true
    console.log(this.name); 
  } 
} 

var otherObject = { name: 'bar' } 
otherObject.sayName = myObject.sayName; 
myObject.sayName(); // foo otherObject.sayName(); // bar

2. 함수를 호출할 때 this 바인딩

함수를 호출할 경우는, 해당 함수 내부 코드에서 사용된this는 전역 객체에 바인딩된다.브라우저에서 자바스크립트를 실행하는 경우 전역 객체는 window 객체다.

var test = 'This is test'; 
console.log(window.test); // 'This is test' 

var sayFoo = function() { 
  console.log(this.test); // 'This is test' 
} 

sayFoo();


  • 메소드 내의 내부함수
    이러한 함수 호출에서의 this 바인딩 특성은내부 함수(inner function)를 호출했을 경우에도 동일하게 적용되므로유의해서 사용해야 한다.
var numbers = {  
   numberA: 5,
   numberB: 10,
   sum: function() {
     console.log(this === numbers); // => true
     function calculate() {
       // this는 window, 엄격 모드였으면 undefined
       console.log(this === numbers); // => false
       return this.numberA + this.numberB;
     }
     return calculate();
   }
};
numbers.sum(); // NaN, 엄격 모드(use strict)였으면 TypeError

 
자바스크립트에서내부 함수 호출 패턴을 정의해 놓지 않았기 때문에,함수로 취급되어 함수 호출 패턴 규칙에 따라 내부 함수의 this는 전역 객체에 바인딩된다. 그래서 흔히들 that 변수를 이용하여 this 값을 저장한다.

var numbers = {  
   numberA: 5,
   numberB: 10,
   sum: function() {
     console.log(this === numbers); // => true
     const that = this
     function calculate() {
       // this는 window, 엄격 모드였으면 undefined
       console.log(this === numbers); // => false
       console.log(that === numbers); // => true
       return that.numberA + that.numberB; // 15
     }
     return calculate();
   }
};
numbers.sum(); // NaN, 엄격 모드(use strict)였으면 TypeError

이와 같은 this 바인딩의 한계를 극복하려고, this 바인딩을 명시적으로 할 수 있도록 call과 apply 메서드를 제공한다.  

  • 클래스 내의 메소드가 가지는 this
    ES6의 문법으로 클래스(class)를 정의할 때도 메소드의 실행 문맥은 인스턴스 객체 자신이다.
class Planet {  
  constructor(name) {
    this.name = name;    
  }
  getName() {
    console.log(this === earth); // => true
    return this.name;
  }
}
var earth = new Planet('Earth');  
// 메소드 실행. 여기서의 this는 earth.
earth.getName(); // => 'Earth'


  • 객체 내의 메소드가 외부에서 분리되었을 때의 this
    객체 내에 있는 메소드는 별도의 변수로 분리가 가능하다. 이 변수를 통해 메소드를 호출할 때! this는 함수 호출에서의 문맥으로 바뀐다.
var obj = {   
    sayHello: function() {
        if(this == obj) {
            console.log('this == obj');
        } else if(this == window) {
            console.log('this == window');
        }
    }   
};

obj .sayHello(); // this == obj
var reference = obj.sayHello;
reference(); // this == window

3. 생성자 함수를 호출할 때 this 바인딩

자바스크립트에서기존 함수에 new 연산자를 붙여서 호출하면 해당 함수는 생성자 함수로 동작한다.일반 함수에 new를 붙여 호출하면 원치 않는 생성자 함수로 동작할 수 있기 때문에, 대부분의 자바스크립트 스타일 가이드에서는 특정 함수가 생성자 함수로 정의되어 있음을 알리려고 함수 이름의 첫 문자를 대문자로 쓰기를 권하고 있다.
 
생성자 함수에서의 this는생성자 함수를 통해 새로 생성되어 반환되는 객체에 바인딩된다.(이는 생성자 함수에서 명시적으로 다른 객체를 반환하지 않는 일반적인 경우에 적용됨)

// Person 생성자 함수 
var Person = function(name) { 
  this.name = name; 
} 
// foo 객체 생성 
var foo = new Person('foo'); 
console.log(foo.name); // foo


  • 객체 리터럴 방식과 생성자 함수를 통한 객체 생성 방식의 차이

객체 리터럴 방식으로 생성된 객체는 생성자 함수처럼 다른 인자를 넣어 형식은 같지만 다른 값을 가지는 객체를 생성할 수 없다.

var foo = { name : 'foo' } 

function Person(name) { 
  this.name = name; 
} 

var bar = new Person('bar'); 
var baz = new Person('baz');

또 다른 차이점은 객체 리터럴 방식으로 생성한 foo 객체의 __proto__ 프로퍼티는 Object.prototype를 가르키며, 생성자 함수를 통해 생성한 bar, baz 객체의 __proto__ 프로퍼티는 Person.prototype를 가르킨다는 점이다.  

  • 생성자 함수를 new를 붙이지 않고 호출할 경우

생성자 함수를 new를 붙이지 않고 호출할 경우 위에서 살펴본2. 함수를 호출할 때 this 바인딩규칙이 적용되어 this가 전역객체에 바인딩된다. 이런 위험성을 피하려고 널리 사용되는 패턴이 있다.

function A(arg) { 
  if (!(this instanceof A)) { 
    return new A(arg); 
  } 

  this.value = arg ? arg : 0; 
}

ES6에서의 class에서 생성자도 this는 새로 생긴 객체다.

class Bar {  
  constructor() {
    console.log(this instanceof Bar); // => true
    this.property = 'Default Value';
  }
}
// Constructor invocation
var barInstance = new Bar();  
barInstance.property; // => 'Default Value'


출처: https://jeong-pro.tistory.com/109?category=799620 [기본기를 쌓는 정아마추어 코딩블로그]

4. call과 apply 메서드를 이용한 명시적인 this 바인딩

Function.prototype 객체의 메서드인 call()과 apply()를 통해 명시적으로 this를 바인딩 가능하다.
간접 실행은 함수가 .call() 이나 .apply 메소드와 함께 호출될 때를 가리킨다.
 
.call(arg1,arg2,...) 메소드는 첫 번째 인자는 실행 문맥(this), 나머지 인자는 호출함수에 전달할 매개변수를 하나씩 받는다.
.apply(arg1,[args]) 메소드는 첫 번째 인자는 실행 문맥(this), 나머지 인자는 호출 함수에 전달할 매개변수를 배열로 받는다.

var rabbit = { name: 'White Rabbit' };  
function concatName(string) {  
  console.log(this === rabbit); // => true
  return string + this.name;
}
// Indirect invocations
concatName.call(rabbit, 'Hello ');  // => 'Hello White Rabbit'  
concatName.apply(rabbit, ['Bye ']); // => 'Bye White Rabbit'
// Person 생성자 함수 
function Person(name) { 
  this.name = name; 
} 

// foo 빈 객체 생성 
var foo = {}; 
Person.apply(foo, ['foo']); 
console.log(foo.name); // foo 
console.log(foo.__proto__ === Object.prototype) // true

예제에서 알 수 있듯이 apply()를 통해 호출한 경우, 생성자 함수 방식이 아닌 this 가 foo 객체에 바인딩되어 proto 프로퍼티가 Person.prototype이 아닌 Object.prototype이다.
 
이처럼 apply()나 call() 메서드는 this를 원하는 값으로 명시적으로 매핑해서 특정 함수나 메서드를 호출할 수 있다는 장점이 있다. 그리고 이들의 대표적인 용도가 arguments 객체와 같은 유사 배열 객체에서 배열 메서드를 사용하는 경우이다. arguments 객체는 실제 배열이 아니므로 pop(), shift() 같은 표준 메서드를 사용할 수 없지만 apply() 메서드를 이용하면 가능하다.

function myFunction() { 

  // arguments.shift(); 에러 발생 
  var args \= Array.prototype.slice.apply(arguments); 
} 

myFunction(); 

출처:

  1. https://itstory.tk/entry/JavaScript-4-함수와-프로토타입-체이닝-2-this란[덕's IT Story]
  2. ES6 화살표 함수(arrow function)를 배우기 전 자바스크립트 this 이해하기


https://dojang.io/mod/page/view.php?id=2431

42.5 클래스로 매개변수와 반환값을 처리하는 데코레이터 만들기

지금까지 클래스로 데코레이터를 만들어보았습니다. 클래스로 만든 데코레이터도 매개변수와 반환값을 처리할 수 있습니다. 다음은 함수의 매개변수를 출력하는 데코레이터입니다(여기서는 위치 인수와 키워드 인수를 모두 처리하는 가변 인수로 만들었습니다).

decorator_class_param_return.py

class Trace:
    def __init__(self, func):    # 호출할 함수를 인스턴스의 초깃값으로 받음
        self.func = func         # 호출할 함수를 속성 func에 저장
 
    def __call__(self, *args, **kwargs):    # 호출할 함수의 매개변수를 처리
        r = self.func(*args, **kwargs) # self.func에 매개변수를 넣어서 호출하고 반환값을 변수에 저장
        print('{0}(args={1}, kwargs={2}) -> {3}'.format(self.func.__name__, args, kwargs, r))
                                            # 매개변수와 반환값 출력
        return r                            # self.func의 반환값을 반환
 
@Trace    # @데코레이터
def add(a, b):
    return a + b
 
print(add(10, 20))
print(add(a=10, b=20))

실행 결과

add(args=(10, 20), kwargs={}) -> 30
30
add(args=(), kwargs={'a': 10, 'b': 20}) -> 30
30

클래스로 매개변수와 반환값을 처리하는 데코레이터를 만들 때는 __call__ 메서드에 매개변수를 지정하고, self.func에 매개변수를 넣어서 호출한 뒤에 반환값을 반환해주면 됩니다. 여기서는 매개변수를 *args**kwargs로 지정했으므로 self.func에 넣을 때는 언패킹하여 넣어줍니다.

    def __call__(self, *args, **kwargs):    # 호출할 함수의 매개변수를 처리
        r = self.func(*args, **kwargs) # self.func에 매개변수를 넣어서 호출하고 반환값을 변수에 저장
        print('{0}(args={1}, kwargs={2}) -> {3}'.format(self.func.__name__, args, kwargs, r))
                                            # 매개변수와 반환값 출력
        return r                            # self.func의 반환값을 반환

물론 가변 인수를 사용하지 않고, 고정된 매개변수를 사용할 때는 def __call__(self, a, b):처럼 만들어도 됩니다.

42.5.1  클래스로 매개변수가 있는 데코레이터 만들기

마지막으로 매개변수가 있는 데코레이터를 만들어보겠습니다. 다음은 함수의 반환값이 특정 수의 배수인지 확인하는 데코레이터입니다.

decorator_class_parameter.py

class IsMultiple:
    def __init__(self, x):         # 데코레이터가 사용할 매개변수를 초깃값으로 받음
        self.x = x                 # 매개변수를 속성 x에 저장
 
    def __call__(self, func):      # 호출할 함수를 매개변수로 받음
        def wrapper(a, b):         # 호출할 함수의 매개변수와 똑같이 지정(가변 인수로 작성해도 됨)
            r = func(a, b)         # func를 호출하고 반환값을 변수에 저장
            if r % self.x == 0:    # func의 반환값이 self.x의 배수인지 확인
                print('{0}의 반환값은 {1}의 배수입니다.'.format(func.__name__, self.x))
            else:
                print('{0}의 반환값은 {1}의 배수가 아닙니다.'.format(func.__name__, self.x))
            return r               # func의 반환값을 반환
        return wrapper             # wrapper 함수 반환
 
@IsMultiple(3)    # 데코레이터(인수)
def add(a, b):
    return a + b
 
print(add(10, 20))
print(add(2, 5))

실행 결과

add의 반환값은 3의 배수입니다.
30
add의 반환값은 3의 배수가 아닙니다.
7

먼저 __init__ 메서드에서 데코레이터가 사용할 매개변수를 초깃값으로 받습니다. 그리고 매개변수를 __call__ 메서드에서 사용할 수 있도록 속성에 저장합니다.

    def __init__(self, x):         # 데코레이터가 사용할 매개변수를 초깃값으로 받음
        self.x = x                 # 매개변수를 속성 x에 저장

지금까지 __init__에서 호출할 함수를 매개변수로 받았는데 여기서는 데코레이터가 사용할 매개변수를 받는다는 점 꼭 기억해두세요.

이제 __call__ 메서드에서는 호출할 함수를 매개변수로 받습니다. 그리고 __call__ 메서드 안에서 wrapper 함수를 만들어줍니다. 이때 wrapper 함수의 매개변수는 호출할 함수의 매개변수와 똑같이 지정해줍니다(가변 인수로 작성해도 됨).

    def __call__(self, func):      # 호출할 함수를 매개변수로 받음
        def wrapper(a, b):         # 호출할 함수의 매개변수와 똑같이 지정(가변 인수로 작성해도 됨)

wrapper 함수 안에서는 func의 반환값이 데코레이터 매개변수 x의 배수인지 확인합니다. 이때 데코레이터 매개변수 x는 속성에 저장되어 있으므로 self.x와 같이 사용해야 합니다. 그리고 배수 확인이 끝났으면 func의 반환값을 반환합니다. 마지막으로 wrapper 함수를 다 만들었으면 return으로 wrapper 함수를 반환합니다.

    def __call__(self, func):      # 호출할 함수를 매개변수로 받음
        def wrapper(a, b):         # 호출할 함수의 매개변수와 똑같이 지정(가변 인수로 작성해도 됨)
            r = func(a, b)         # func를 호출하고 반환값을 변수에 저장
            if r % self.x == 0:    # func의 반환값이 self.x의 배수인지 확인
                print('{0}의 반환값은 {1}의 배수입니다.'.format(func.__name__, self.x))
            else:
                print('{0}의 반환값은 {1}의 배수가 아닙니다.'.format(func.__name__, self.x))
            return r               # func의 반환값을 반환
        return wrapper             # wrapper 함수 반환

데코레이터를 사용할 때는 데코레이터에 ( )(괄호)를 붙인 뒤 인수를 넣어주면 됩니다.

@데코레이터(인수)
def 함수이름():
    코드
@IsMultiple(3)    # 데코레이터(인수)
def add(a, b):
    return a + b

지금까지 데코레이터를 사용하는 방법을 배웠는데 문법이 조금 복잡했습니다. 여기서는 데코레이터가 기존 함수를 수정하지 않으면서 추가 기능을 구현할 때 사용한다는 점만 기억하면 됩니다. 보통 데코레이터는 프로그램의 버그를 찾는 디버깅, 함수의 성능 측정, 함수 실행 전에 데이터 확인 등에 활용합니다(앞에서 만든 함수의 시작과 끝을 출력하는 데코레이터, 매개변수와 반환값을 출력하는 데코레이터는 디버깅에 활용할 수 있습니다. 그리고 함수 실행 전에 데이터를 확인하는 예제는 연습문제에서 소개하겠습니다).


https://dojang.io/mod/page/view.php?id=2430


42.4 클래스로 데코레이터 만들기

이번에는 클래스로 데코레이터를 만드는 방법을 알아보겠습니다. 특히 클래스를 활용할 때는 인스턴스를 함수처럼 호출하게 해주는 __call__ 메서드를 구현해야 합니다.

다음은 함수의 시작과 끝을 출력하는 데코레이터입니다.

decorator_class.py

class Trace:
    def __init__(self, func):    # 호출할 함수를 인스턴스의 초깃값으로 받음
        self.func = func         # 호출할 함수를 속성 func에 저장
 
    def __call__(self):
        print(self.func.__name__, '함수 시작')    # __name__으로 함수 이름 출력
        self.func()                               # 속성 func에 저장된 함수를 호출
        print(self.func.__name__, '함수 끝')
 
@Trace    # @데코레이터
def hello():
    print('hello')
 
hello()    # 함수를 그대로 호출

실행 결과

hello 함수 시작
hello
hello 함수 끝

클래스로 데코레이터를 만들 때는 먼저 __init__ 메서드를 만들고 호출할 함수를 초깃값으로 받습니다. 그리고 매개변수로 받은 함수를 속성으로 저장합니다.

class Trace:
    def __init__(self, func):    # 호출할 함수를 인스턴스의 초깃값으로 받음
        self.func = func         # 호출할 함수를 속성 func에 저장

이제 인스턴스를 호출할 수 있도록 __call__ 메서드를 만듭니다. __call__ 메서드에서는 함수의 시작을 알리는 문자열을 출력하고, 속성 func에 저장된 함수를 호출합니다. 그다음에 함수의 끝을 알리는 문자열을 출력합니다.

    def __call__(self):
        print(self.func.__name__, '함수 시작')    # __name__으로 함수 이름 출력
        self.func()                               # 속성 func에 저장된 함수를 호출
        print(self.func.__name__, '함수 끝')

데코레이터를 사용하는 방법은 클로저 형태의 데코레이터와 같습니다. 호출할 함수 위에 @을 붙이고 데코레이터를 지정하면 됩니다.

@데코레이터
def 함수이름():
    코드
@Trace    # @데코레이터
def hello():
    print('hello')

@으로 데코레이터를 지정했으므로 함수는 그대로 호출해줍니다.

hello()    # 함수를 그대로 호출

참고로 클래스로 만든 데코레이터는 @을 지정하지 않고, 데코레이터의 반환값을 호출하는 방식으로도 사용할 수 있습니다. 다음과 같이 데코레이터에 호출할 함수를 넣어서 인스턴스를 생성한 뒤 인스턴스를 호출해주면 됩니다. 즉, 클래스에 __call__ 메서드를 정의했으므로 함수처럼 ( )(괄호)를 붙여서 호출할 수 있습니다.

def hello():    # @데코레이터를 지정하지 않음
    print('hello')
 
trace_hello = Trace(hello)    # 데코레이터에 호출할 함수를 넣어서 인스턴스 생성
trace_hello()                 # 인스턴스를 호출. __call__ 메서드가 호출됨


https://dojang.io/mod/page/view.php?id=2429

42.3 매개변수가 있는 데코레이터 만들기

이번에는 매개변수가 있는 데코레이터를 만들어보겠습니다. 이런 방식의 데코레이터는 값을 지정해서 동작을 바꿀 수 있습니다. 다음은 함수의 반환값이 특정 수의 배수인지 확인하는 데코레이터입니다.

decorator_parameter.py

def is_multiple(x):              # 데코레이터가 사용할 매개변수를 지정
    def real_decorator(func):    # 호출할 함수를 매개변수로 받음
        def wrapper(a, b):       # 호출할 함수의 매개변수와 똑같이 지정
            r = func(a, b)       # func를 호출하고 반환값을 변수에 저장
            if r % x == 0:       # func의 반환값이 x의 배수인지 확인
                print('{0}의 반환값은 {1}의 배수입니다.'.format(func.__name__, x))
            else:
                print('{0}의 반환값은 {1}의 배수가 아닙니다.'.format(func.__name__, x))
            return r             # func의 반환값을 반환
        return wrapper           # wrapper 함수 반환
    return real_decorator        # real_decorator 함수 반환
 
@is_multiple(3)     # @데코레이터(인수)
def add(a, b):
    return a + b
 
print(add(10, 20))
print(add(2, 5))

실행 결과

add의 반환값은 3의 배수입니다.
30
add의 반환값은 3의 배수가 아닙니다.
7

실행을 해보면 add 함수의 반환값이 3의 배수인지 아닌지 알려줍니다

지금까지 데코레이터를 만들 때 함수 안에 함수를 하나만 만들었습니다. 하지만 매개변수가 있는 데코레이터를 만들 때는 함수를 하나 더 만들어야 합니다.

먼저 is_multiple 함수를 만들고 데코레이터가 사용할 매개변수 x를 지정합니다. 그리고 is_multiple 함수 안에서 실제 데코레이터 역할을 하는 real_decorator를 만듭니다. 즉, 이 함수에서 호출할 함수를 매개변수로 받습니다. 그다음에 real_decorator 함수 안에서 wrapper 함수를 만들어주면 됩니다.

def is_multiple(x):              # 데코레이터가 사용할 매개변수를 지정
    def real_decorator(func):    # 호출할 함수를 매개변수로 받음
        def wrapper(a, b):       # 호출할 함수의 매개변수와 똑같이 지정

wrapper 함수 안에서는 먼저 func의 결과가 데코레이터 매개변수 x의 배수인지 확인합니다. 그다음에 func의 반환값을 반환합니다.

def is_multiple(x):              # 데코레이터가 사용할 매개변수를 지정
    def real_decorator(func):    # 호출할 함수를 매개변수로 받음
        def wrapper(a, b):       # 호출할 함수의 매개변수와 똑같이 지정
            r = func(a, b)       # func를 호출하고 반환값을 변수에 저장
            if r % x == 0:       # func의 반환값이 x의 배수인지 확인
                print('{0}의 반환값은 {1}의 배수입니다.'.format(func.__name__, x))
            else:
                print('{0}의 반환값은 {1}의 배수가 아닙니다.'.format(func.__name__, x))
            return r             # func의 반환값을 반환

여기서는 real_decoratorwrapper 함수를 두 개 만들었으므로 함수를 만든 뒤에 return으로 두 함수를 반환해줍니다.

        return wrapper           # wrapper 함수 반환
    return real_decorator        # real_decorator 함수 반환

데코레이터를 사용할 때는 데코레이터에 ( )(괄호)를 붙인 뒤 인수를 넣어주면 됩니다.

@데코레이터(인수)
def 함수이름():
    코드
@is_multiple(3)     # @데코레이터(인수)
def add(a, b):
    return a + b

여기서는 is_multiple에 3을 지정해서 add 함수의 반환값이 3의 배수인지 확인했습니다. 물론 is_multiple에 다른 숫자를 넣으면 함수의 반환값이 해당 숫자의 배수인지 확인해줍니다.

참고 | 매개변수가 있는 데코레이터를 여러 개 지정하기

매개변수가 있는 데코레이터를 여러 개 지정할 때는 다음과 같이 인수를 넣은 데코레이터를 여러 줄로 지정해줍니다.

@데코레이터1(인수)
@데코레이터2(인수)
def 함수이름():
    코드
@is_multiple(3)
@is_multiple(7)
def add(a, b):
    return a + b
 
add(10, 20)

실행 결과

add의 반환값은 7의 배수가 아닙니다.
wrapper의 반환값은 3의 배수입니다.

@을 사용하지 않았을 때는 다음 코드와 동작이 같습니다.

decorated_add = is_multiple(3)(is_multiple(7)(add))
decorated_add(10, 20)
참고 | 원래 함수 이름이 안나온다면?

데코레이터를 여러 개 사용하면 데코레이터에서 반환된 wrapper 함수가 다른 데코레이터로 들어갑니다. 따라서 함수의 __name__을 출력해보면 wrapper가 나옵니다.

add의 반환값은 7 배수가 아닙니다.
wrapper의 반환값은 3 배수입니다.

함수의 원래 이름을 출력하고 싶다면 functools 모듈의 wraps 데코레이터를 사용해야 합니다. 다음과 같이 @functools.wraps에 func를 넣은 뒤 wrapper 함수 위에 지정해줍니다(from functools import wraps로 데코레이터를 가져왔다면 @wraps(func)를 지정).

decorator_functools_wraps.py

import functools
 
def is_multiple(x):
    def real_decorator(func):
        @functools.wraps(func)    # @functools.wraps에 func를 넣은 뒤 wrapper 함수 위에 지정
        def wrapper(a, b):
            r = func(a, b)
            if r % x == 0:
                print('{0}의 반환값은 {1}의 배수입니다.'.format(func.__name__, x))
            else:
                print('{0}의 반환값은 {1}의 배수가 아닙니다.'.format(func.__name__, x))
            return r
        return wrapper
    return real_decorator
 
@is_multiple(3)
@is_multiple(7)
def add(a, b):
    return a + b
 
add(10, 20)

실행 결과

add의 반환값은 7의 배수가 아닙니다.
add의 반환값은 3의 배수입니다.

@functools.wraps는 원래 함수의 정보를 유지시켜줍니다. 따라서 디버깅을 할 때 유용하므로 데코레이터를 만들 때는 @functools.wraps를 사용하는 것이 좋습니다.


+ Recent posts