
1. 페이지를 만들기 전에 할 것들
프로젝트를 생성한다.
다음의 커멘드로 프로젝트를 시작한다.
> django-admin startproject [projectName]
앱을 생성한다.
다음의 커맨드로 앱을 생성한다.
> python manage.py startapp [appName]그럼 아래와 같은 트리 구조가 생성될 것이다.

DB를 생성한다.
장고는 sql을 날려, 테이블을 만들거나, 데이터를 인서트하거나, 데이터를 셀레트할 필요가 없다. 다 준비가 되어 있다..
root > projectName 직하에 있는 models.py를 열어 다음과 같이 코딩한다.
models.Model을 상속하는 각 클래스는 sqlite3의 각 테이블이라고 생각하면 된다.
아래에서는 Article이라는 테이블을 생성한 것과 같다.
# models.py
from django.db import models

# Create your models here.
class Article(models.Model):
    # Override Fields
    # 이게 데이터베이스에서 테이블의 컬럼을 만드는 것임
    name = models.CharField(max_length=50)
    title = models.CharField(max_length=50)
    contents = models.TextField()
    url = models.URLField()
    email = models.EmailField()
    cDate = models.DateTimeField(auto_now_add=True)
이번에는 Table 정보를 생성했다면, db생성해보자. 다음과 같은 명령어를 통해 models.py에 기재되어 있는 테이블 정보에 따라 테이블을 생성할 수 있다. migrate 커맨드는 내부적으로 models.py와 맵핑이 되어 있는 듯하다..
python manage.py makemigrations과 python manage.py migrate의 차이는 다음과 같다.
- python manage.py makemigrations : Create the migrations (generate theSQLcommands)
- python manage.py migrate: Run the migrations (execute theSQLcommands)
> python manage.py makemigrations
> python manage.py migrate
django.db.backends.sqlite3 db생성완료!

직접 DB에 접속하여 내부를 확인해 볼 수도 있다.
편리하게 생성해주긴 하는데, nodejs나 java를 통해 웹개발은 해온 개발자라면, 직접 db를 보지 않고서는 영 찜찜하다..
python manage.py migrate커맨드를 실행했다면, root디렉토리에 db.sqlite3라는 파일이 생성되는데, 이 파일이 있는 루트디렉토리로 이동을 하자.
다음은 루트디렉토리에서 다음 명령어를 실행해여 sqlite3에 접속한다.
(C:\dev\venv\django_prct) C:\dev\project\tutorial>python manage.py dbshell
SQLite version 3.28.0 2019-04-16 19:49:53
Enter ".help" for usage hints.
sqlite> .tables
auth_group                  community_article
auth_group_permissions      django_admin_log
auth_permission             django_content_type
auth_user                   django_migrations
auth_user_groups            django_session
auth_user_user_permissions
sqlite> select * from community_article;
1|fesfes|fesfse|fefse|http://localhost:8000/write/|esfes@fafe.com|2019-06-29 06:45:25.432674
2|fesfes|fesfes|fesfes|http://localhost:8000/write/|fsfefes@fefes.com|2019-06-29 06:49:10.086916
3|fesfes|fesfes|fesfes|http://localhost:8000/write/|fesfes@fesf.com|2019-06-29 06:54:31.518178
4|fesfs|fesef|fesfs|http://localhost:8000/write/|fesfes@rfesfes.com|2019-06-29 06:55:13.687593
5|fesf|sfesfes|fesfesf|http://localhost:8000/write/|fesfes@fesfes.com|2019-06-29 06:55:49.860857
6|fesfs|fesfes|fesfes|http://localhost:8000/write/|fessef@fesfes.com|2019-06-29 07:36:38.165274
7|fesfes|fesfse|fesfes|http://localhost:8000/write/|fesfes@fesfes.com|2019-06-29 07:39:48.148141
table명은 [어플명]_[models.py 내부의 클래스명]의 조합으로 이루어진다.
sql 명령어는 동일한데, DB확인용 커맨드(show tables, show databases와 같은..)는 기존의 DB와 다르다. 이것을 확인하기 위해서는 다음의 url을 참고하길 바란다.
(https://qiita.com/ChiakiYamaoka/items/b7c7863688d6f23c0501)[https://qiita.com/ChiakiYamaoka/items/b7c7863688d6f23c0501]%5Bhttps://qiita.com/ChiakiYamaoka/items/b7c7863688d6f23c0501%5D)
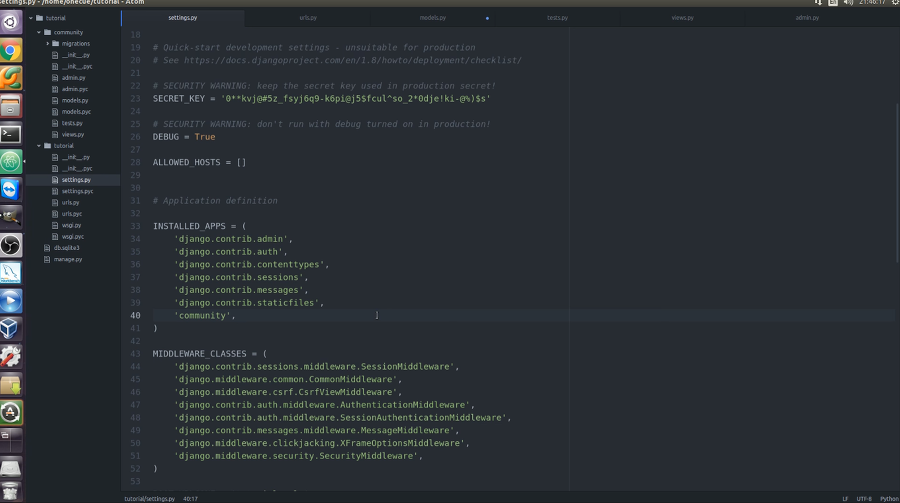
settings.py의 내부를 좀 구경해보자.
"""
Django settings for tutorial project.

Generated by 'django-admin startproject' using Django 2.2.2.

For more information on this file, see
https://docs.djangoproject.com/en/2.2/topics/settings/

For the full list of settings and their values, see
https://docs.djangoproject.com/en/2.2/ref/settings/
"""

import os

# Build paths inside the project like this: os.path.join(BASE_DIR, ...)
BASE_DIR = os.path.dirname(os.path.dirname(os.path.abspath(__file__)))


# Quick-start development settings - unsuitable for production
# See https://docs.djangoproject.com/en/2.2/howto/deployment/checklist/

# SECURITY WARNING: keep the secret key used in production secret!
SECRET_KEY = 'aqx)diiou-)pt#h@%uz&*y(bd102+p02pbm6s64nu_#seeu@d_'

# SECURITY WARNING: don't run with debug turned on in production!
DEBUG = True

ALLOWED_HOSTS = []


# Application definition

INSTALLED_APPS = [
    'django.contrib.admin',
    'django.contrib.auth',
    'django.contrib.contenttypes',
    'django.contrib.sessions',
    'django.contrib.messages',
    'django.contrib.staticfiles',
    'community',# python manage.py startapp community명령으로 설치한 community앱을 등록해줘야함
]

MIDDLEWARE = [
    'django.middleware.security.SecurityMiddleware',
    'django.contrib.sessions.middleware.SessionMiddleware',
    'django.middleware.common.CommonMiddleware',
    'django.middleware.csrf.CsrfViewMiddleware',
    'django.contrib.auth.middleware.AuthenticationMiddleware',
    'django.contrib.messages.middleware.MessageMiddleware',
    'django.middleware.clickjacking.XFrameOptionsMiddleware',
]

ROOT_URLCONF = 'tutorial.urls'

TEMPLATES = [
    {
        'BACKEND': 'django.template.backends.django.DjangoTemplates',
        'DIRS': [],
        'APP_DIRS': True,
        'OPTIONS': {
            'context_processors': [
                'django.template.context_processors.debug',
                'django.template.context_processors.request',
                'django.contrib.auth.context_processors.auth',
                'django.contrib.messages.context_processors.messages',
            ],
        },
    },
]

WSGI_APPLICATION = 'tutorial.wsgi.application'


# Database
# https://docs.djangoproject.com/en/2.2/ref/settings/#databases

DATABASES = {
    'default': {
        'ENGINE': 'django.db.backends.sqlite3',
        'NAME': os.path.join(BASE_DIR, 'db.sqlite3'),
    }
}


# Password validation
# https://docs.djangoproject.com/en/2.2/ref/settings/#auth-password-validators

AUTH_PASSWORD_VALIDATORS = [
    {
        'NAME': 'django.contrib.auth.password_validation.UserAttributeSimilarityValidator',
    },
    {
        'NAME': 'django.contrib.auth.password_validation.MinimumLengthValidator',
    },
    {
        'NAME': 'django.contrib.auth.password_validation.CommonPasswordValidator',
    },
    {
        'NAME': 'django.contrib.auth.password_validation.NumericPasswordValidator',
    },
]


# Internationalization
# https://docs.djangoproject.com/en/2.2/topics/i18n/

LANGUAGE_CODE = 'en-us'

TIME_ZONE = 'UTC'

USE_I18N = True

USE_L10N = True

USE_TZ = True


# Static files (CSS, JavaScript, Images)
# https://docs.djangoproject.com/en/2.2/howto/static-files/

STATIC_URL = '/static/'
setting.py <- config파일 + 라이브러리 옵션파일 이라고 보면될듯
- BASE_DIR = os.path.dirname(os.path.dirname(os.path.abspath(file))):root directory를 지정한다.
- debug.py : 개발할때는 true, 배포할대는 false
- installed_app : pip으로 웹어플 프로젝트를 추가하거나 본인의 앱을 등록
- middleware_classes : request,response에서 인증 보안과 관련된 내용들
- databases : 어댑터를 설정하면 db정보를 적어서 연결함
- static_url : 정적파일의 디렉토리를 패싱
superuser 생성하고 앱실행
슈퍼유저는 다음의 커맨드로 생성한다.
슈퍼유저는 admin페이지에 들어갈 때 사용되는 root어카운트이다.
> python manage.py createsuperuser앱실행은 다음의 커맨드로 실행한다.
> python manage.py runserver
> python manage.py runserver \[포트번호\]  #포트변경
localhost:8000 메인확인
localhost:8000/admin 어드민페이지확인
# python manage.py startapp community명령으로 설치한 community앱을 등록해줘야함
'frameworks > django' 카테고리의 다른 글
| aws에 django 어플을 deploy할때, ALLOWED_HOSTS에 웹어플의 root url을 ALLOWED_HOSTS에 추가하기 (0) | 2019.08.13 |
|---|---|
| Django - 클래스형 뷰 (1) | 2019.07.07 |
| django 듀토리얼#4 : get /list, post /view만들기 (0) | 2019.06.30 |
| django 듀토리얼#3 : get /write, post /save 만들기 (0) | 2019.06.29 |
| pycharm에서 django서버, debug 실행하기 (0) | 2019.06.29 |